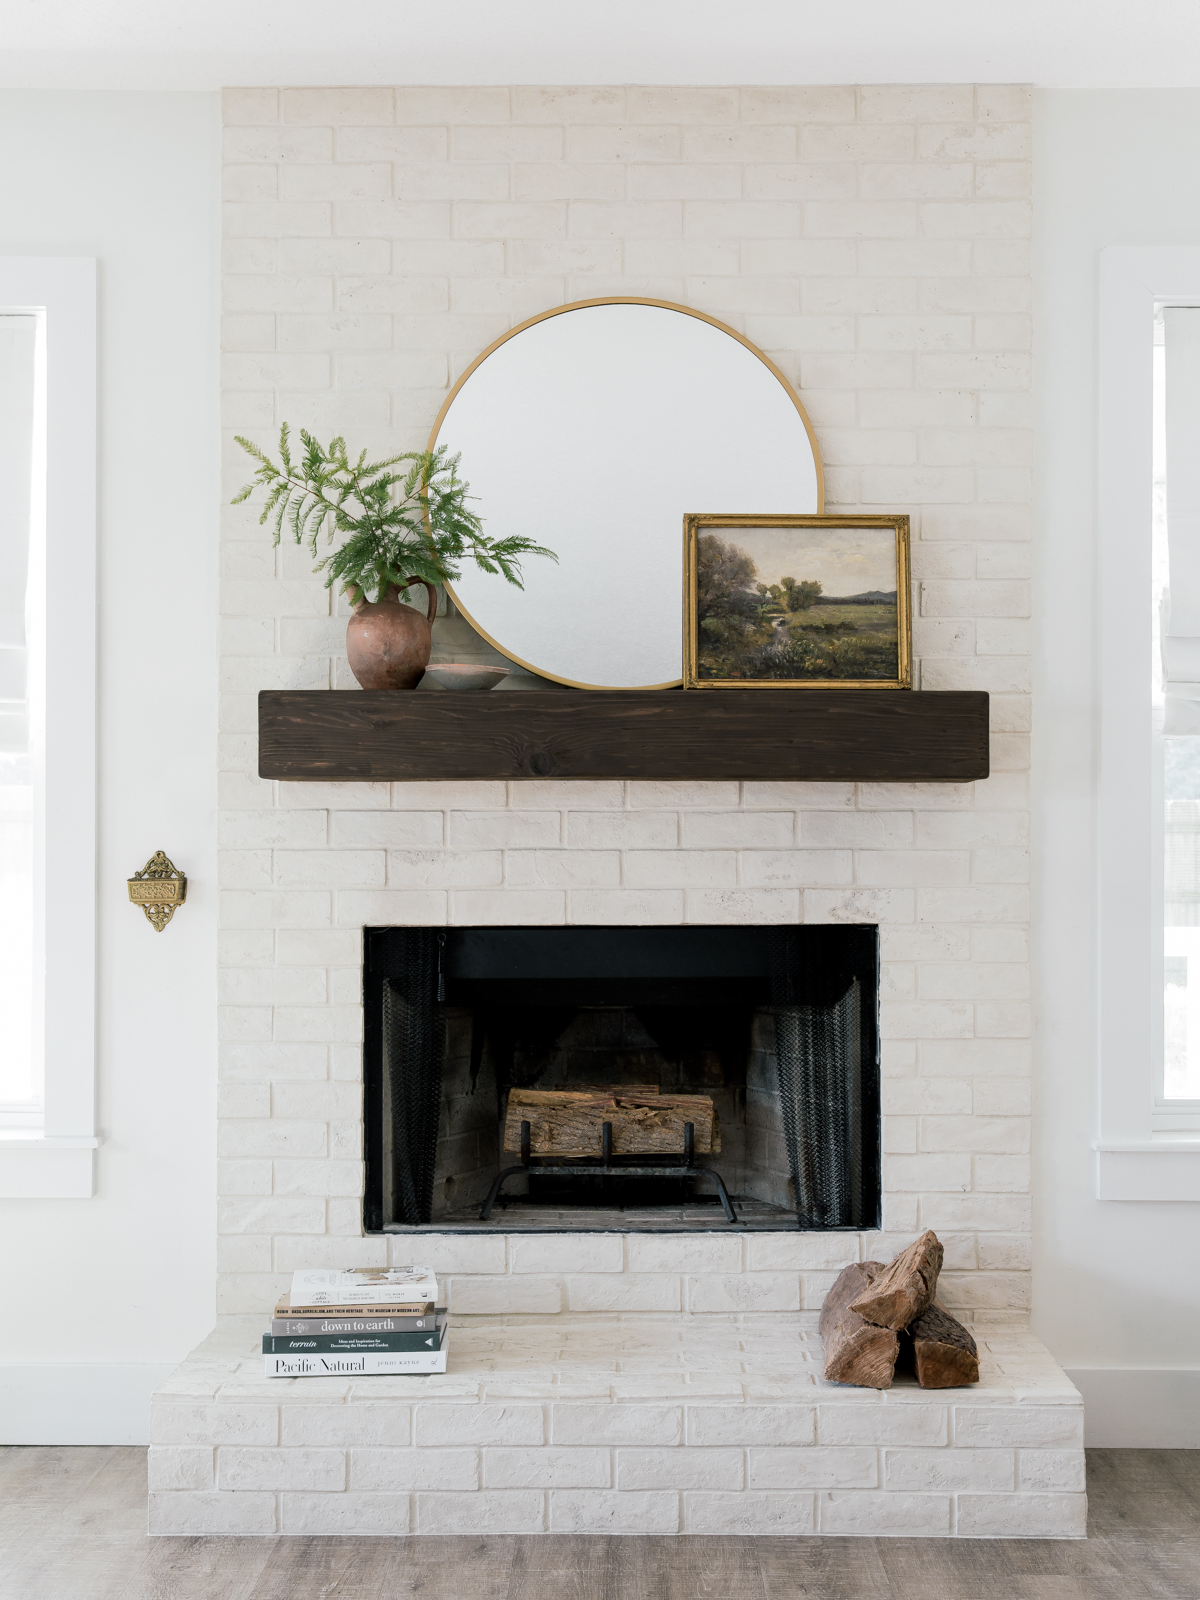
Over the last year our mantel has looked like this, and then like this, and then we built this, and today we are revealing a new look! A look that finally feels right- and we are excited to share all about the new product we used and what we did to achieve this look.

Get The Look
see below for more sources
Our mantel is a solid 8′ Cedar beam we purchased from our local lumbar yard and we cut it in half- so the final dimensions are 4′ long by 8″ deep and 6″ high.
When we first moved in, almost 7 years ago, we left the beam raw and untouched… it was pretty rough so that made it hard to clean or wipe down so that’s when we decided to start experimenting with it. If you clicked on the links above, you saw the transformation this mantel went through- from raw, to stained black, to sanded back down completely to now.
Honestly, while we liked the looked of the sanded raw beam, it was still very orange (you could never tell in photos because I would edit and desaturate the orange out) and didn’t match anything else in our front room. So, we decided to try a new product and bring in some warmth and contrast to our fireplace area.
First, we needed to sand down all of the black stain that was on it. After most of the black stain was sanded off, we took a few carving tools to it and started to remove chunks from the beam so it appeared aged. We also used a heavy grit sandpaper to soften the edges and round the corners a bit so the beam looked more worn.
Once we were happy with the overall look, we mixed some different stains and started testing them out… we probably tried 6 different stains but weren’t happy with any of them as they either enhanced the grain too much or were still pulling out the orange tones in the wood.
We then decided to try Varathane’s new Aged Wood Accelerator stain in Rustic Brown- we love that this stain didn’t enhance the wood grain and that it dried a pretty neutral brown with no weird undertones. We ended up applying 2 coats of this product to the wood for a richer and more saturated look.
If you want to watch the video of some of the process, click here.
We love that the mantel blends well with our coffee table now and our new console table (coming soon) and doesn’t stick out anymore! We would love to know what you think of the new look!
Sources
- 8′ Cedar Beam – Lumber 84 (or your local lumber yard)
- Stain
- Vintage Clay Jug
- Artwork
- Mirror
- Brick
- Small Bowl
- Match Holder – Vintage Family Heirloom
- Roman Linen Shades
Stay tuned for our artwork sourcing, printing, and framing blogpost coming next!


