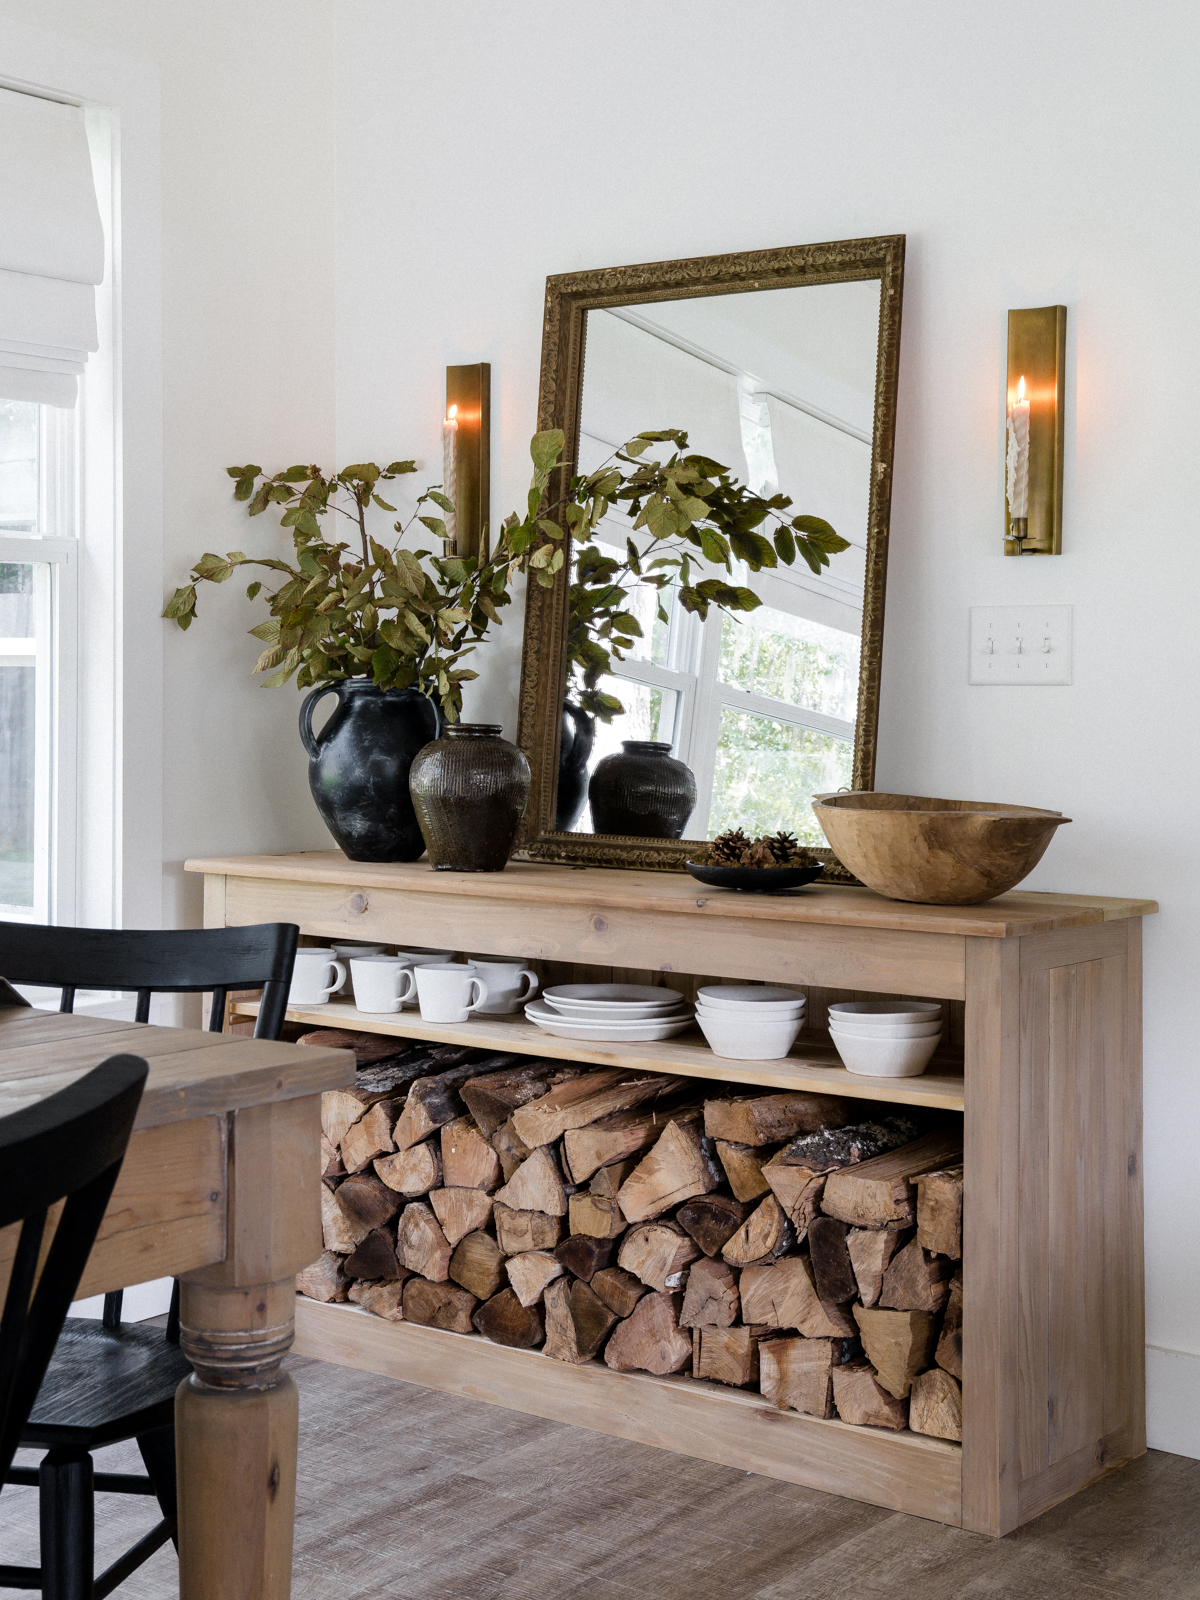
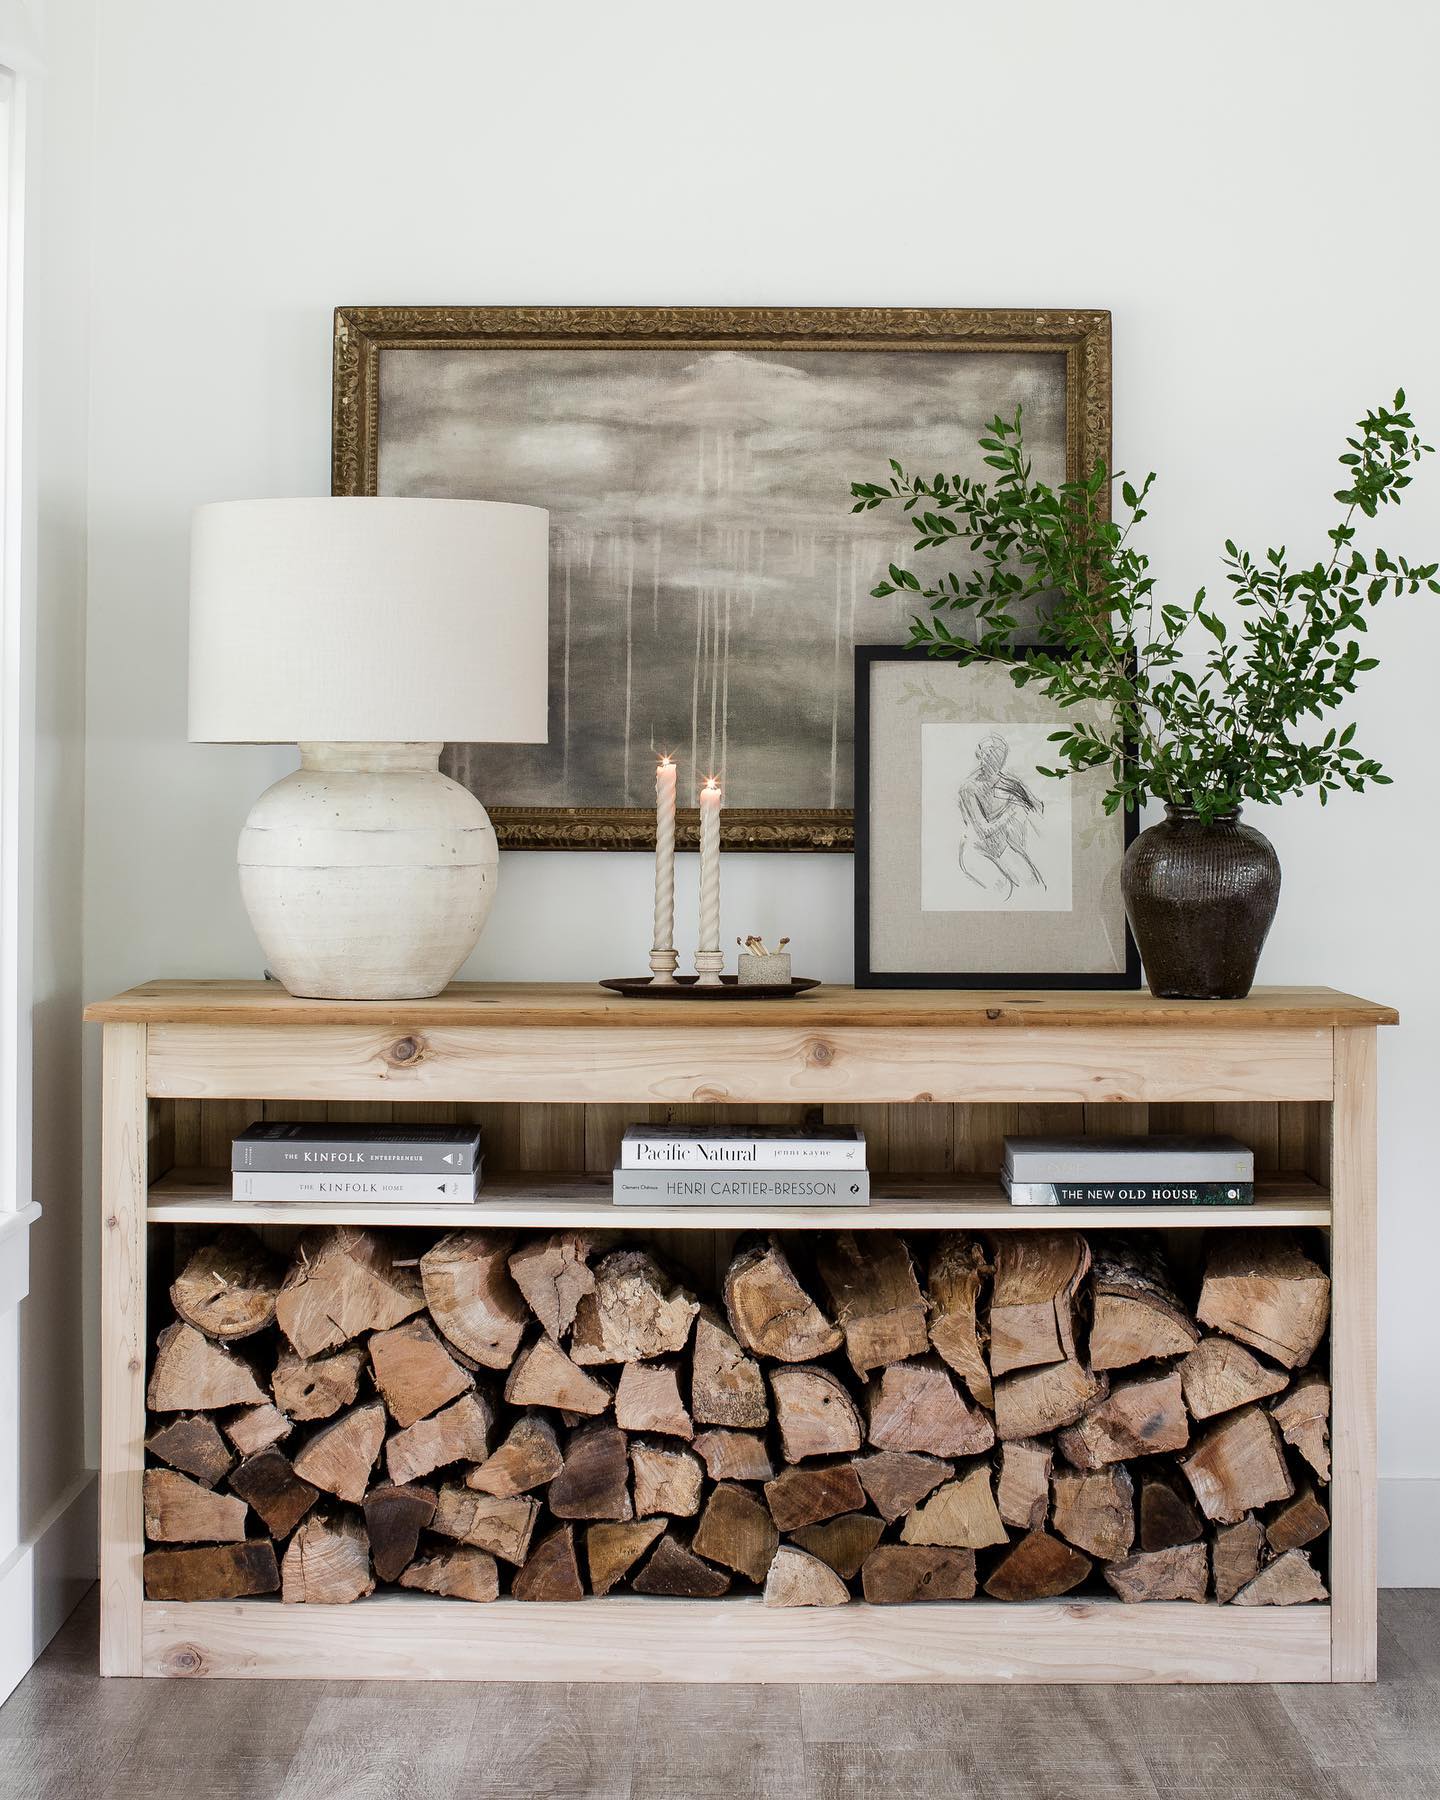
While working on our Dining Room, we kept going back and forth on what to purchase for this wall… we tried to search for the perfect vintage console table, or a reclaimed elm table but nothing was the right size. After coming across this image, we knew we could build something similar. This was Justin’s first piece of furniture that he has built and I’m so proud of how it turned out! It’s beautiful, functional holding our firewood during these cooler months, and meaningful!
Since sharing this console in this post, we have received multiple requests asking us for the plans… while we don’t have step by step photos, we hope our drawings and tutorial below is helpful!
NOTE : We used leftover wood from previous projects to build this piece. You can essentially build this out of whatever wood you would like, Oak would be really beautiful, but we used Cedar.
Materials and Tools
- 2x4s for the frame
- 1/2 ” Plywood for the bottom frame
- Cedar planks that we ripped down on our table saw
- Table Saw to miter the 8 corner boards
- Screws to secure the 2×4 frames
- Nail Gun to secure the Cedar boards to the 2×4 frame
- Wood putty, natural color to hide the nail holes
- We stained and finished it following this method
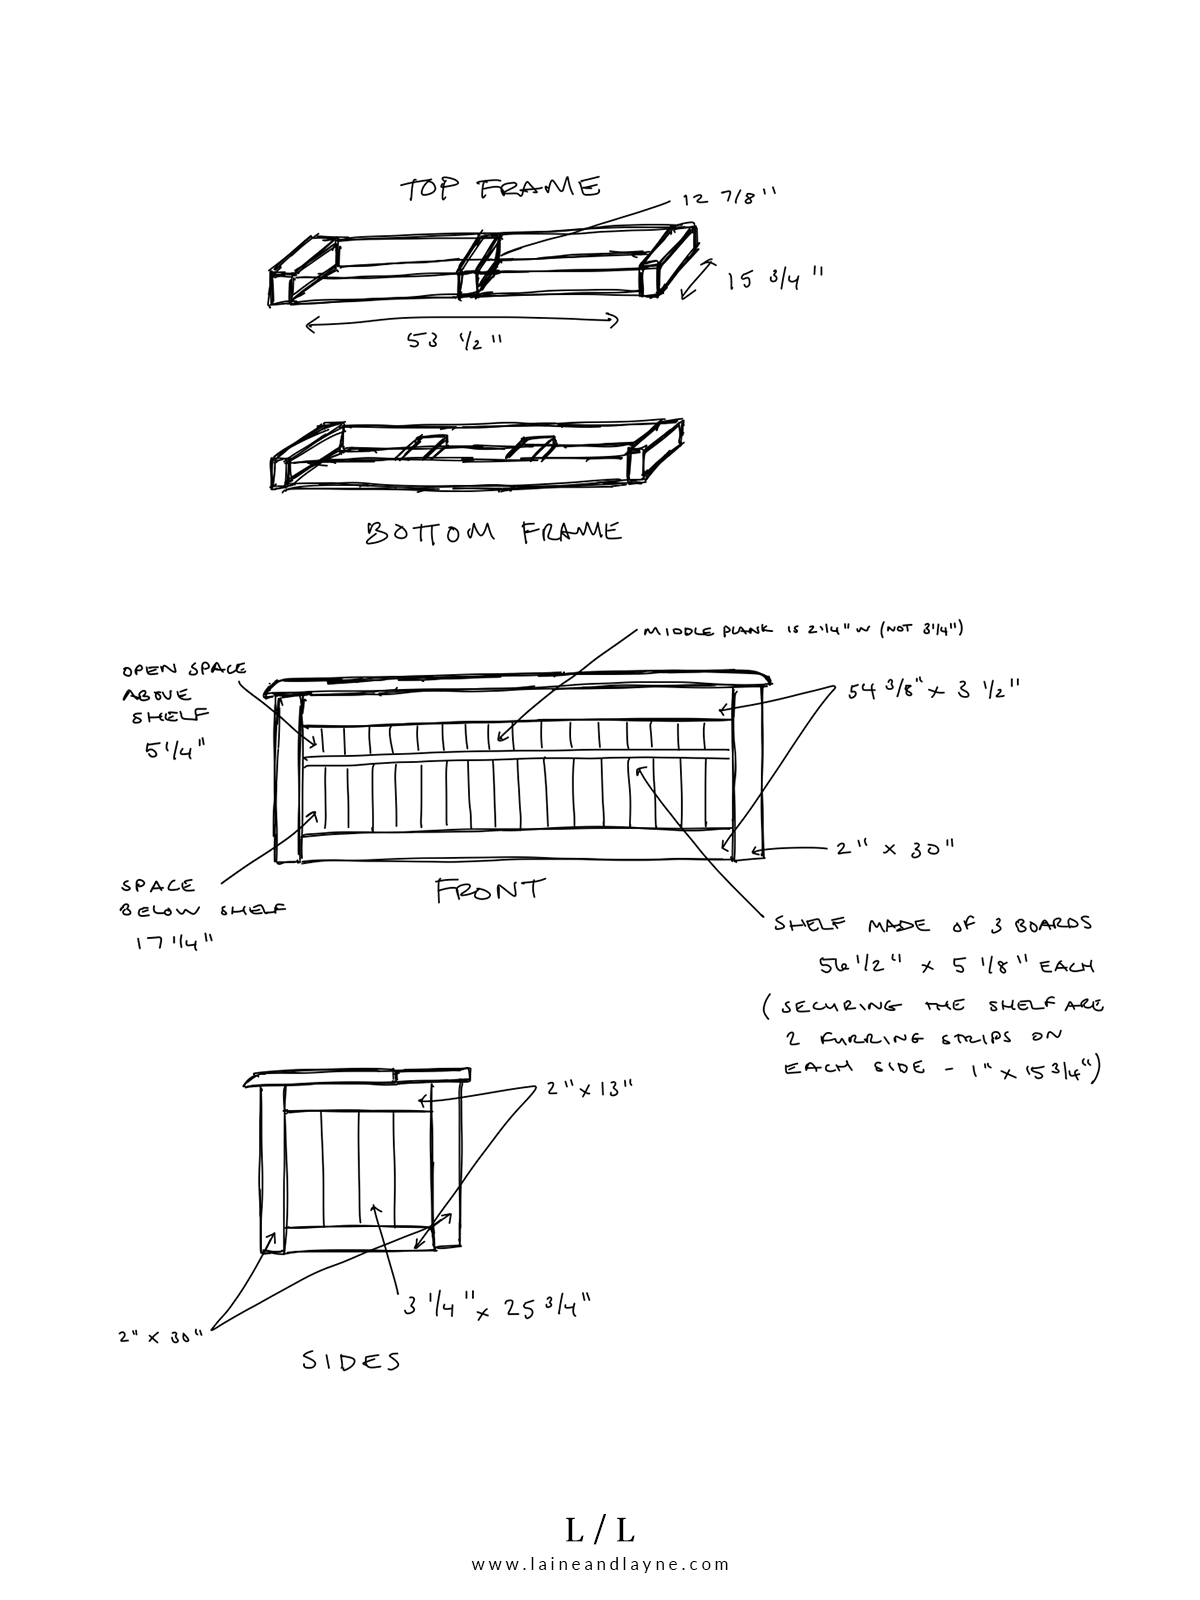
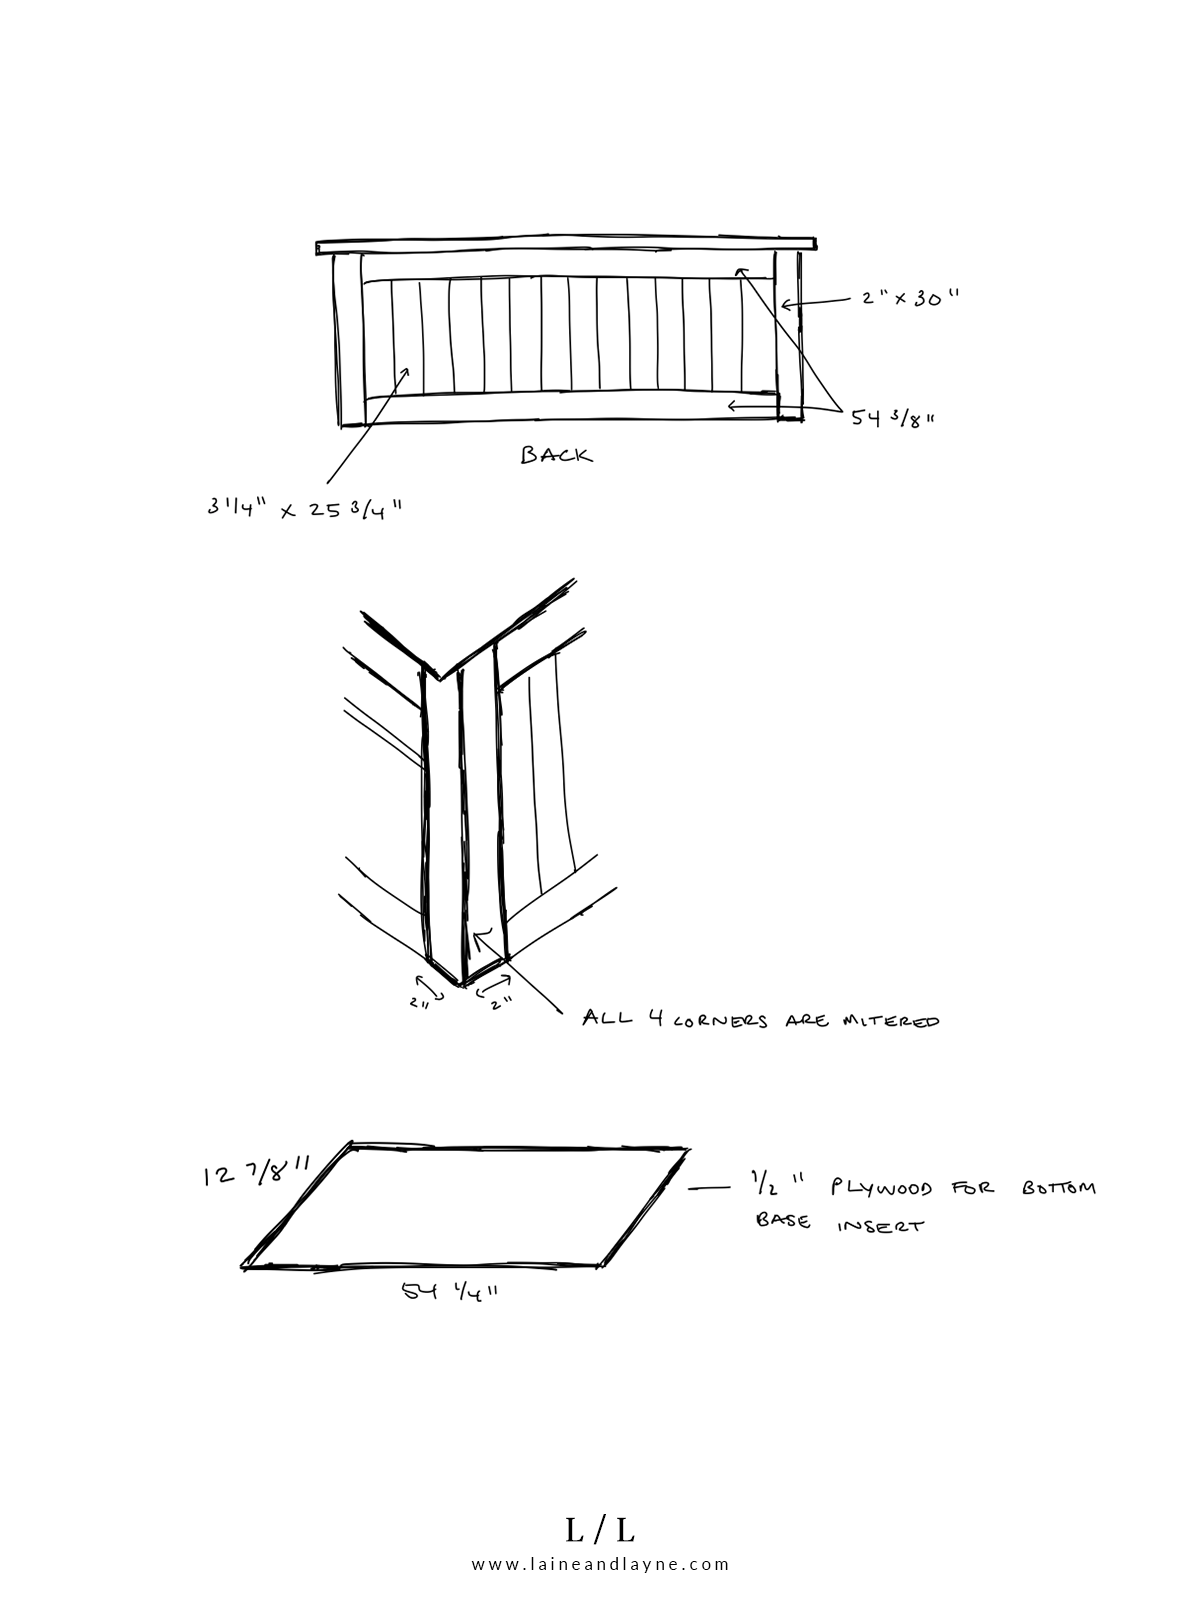
The Plans
How To
NOTE : You can build this piece to whatever size you would like… while trying to determine what to use as a top, we found this old piece of Pine that use to hang in my Grandparent’s laundry room as a shelf, so we built the console table to fit this top board and also to fill the wall in our dining room.
01 – Start by building your two frames, the bottom and top, out of 2x4s. On the bottom frame, you will see in the drawing above, the two middle support braces aren’t turned like the sides and are attached flat and set down slightly so the plywood can sit inside the frame and not on top.
02 – Next, attach your corners. Start by attaching each corner to the bottom frame first with a nail gun, then lay your top frame down and flip the bottom frame with the corners attached onto the top frame and nail the corners to the top frame. Flip back over.
03 – Now let’s fill in the sides and back… starting with the sides, attach your two horizontal boards on the top and bottom, and then fill in with the four vertical boards.
04 – Add the horizontal boards to the front top and bottom to cover the exposed 2x4s.
05 – Add a shelf if you want… nail two furring strips to the inside sides which will be the braces for your shelf. Place your boards down from the top onto the furring strips and secure to the strips.
06 – Attach your top. We had to use two planks since the Pine board we had wasn’t quite the right depth. You could use one solid piece for a seamless look or planks like we did for a more rustic look. The top has a 3/4″ overhang all around. We also sanded the top edge of the boards to have a slight rounded and worn edge.
07 – Place the plywood in the bottom frame and secure with nails. You could essentially skip this step, but we added the plywood to hold in any loose wood chips from the firewood to keep it from falling onto the floor and making a mess.
08 – Fill your nail holes and the corner seams with wood putty and sand before staining or waxing!
09 – Fill with firewood! And if you are wondering about bugs, we have always stored firewood inside and have never noticed bugs… we burn our wood in the cooler months so we are constantly using and replacing the stack.
10 – Style and ENJOY!
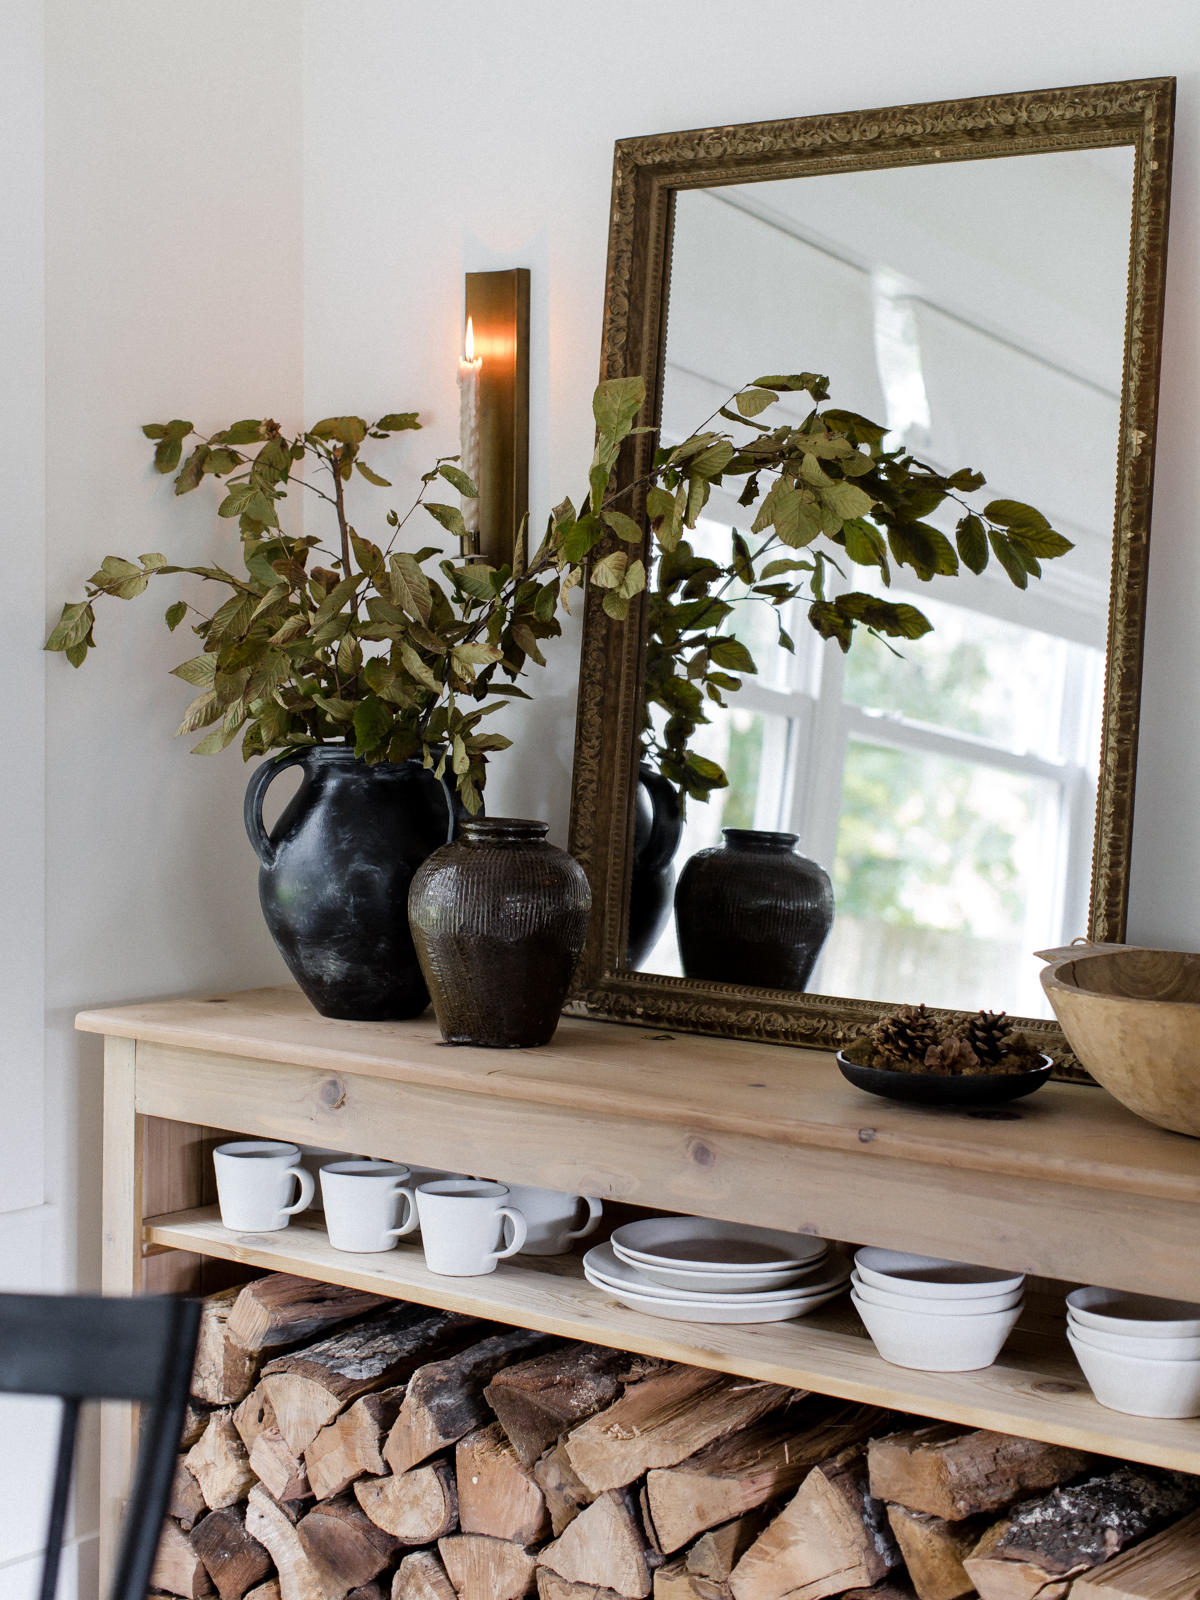
In the image above, you can see the furring strip attached to the inside of the side for the shelf planks to sit on top of. We decided to add the shelf last minute, and I am so glad we did! We initially designed it to hold our books which you can see below, but we love it styled with our dinnerware too.
The image above is before we applied any stain or finish on it… I was hesitant to do anything because I did love the look of it raw, but wanted it to look more finished so we applied the same technique to it that we used on our dining table.

If you have any questions, just ask! We can’t wait to see all of your console tables! 🙂
Looking for dining room sources? Click here.
