When we made the decision to remove our DIY Barnwood Shelf, I knew I would still want some sort of shelf for storage. After coming across this shelf with brass gallery rails, I knew it was the perfect solution and would fit best with the aesthetic of the bathroom. I remembered we already had vintage brass gallery rails from a piece of furniture we were refinishing, so I told Justin about the project and we came up with a gameplan!

I first thought I wanted to paint the shelf white so it would blend in with the walls, but after installing the walnut wood curtain rods, I knew I wanted to tie in that same wood tone on this side of the bathroom. After a few different stain tests, English Chestnut ended up being the winner.
Here’s What We Needed
- (1) 1×4 Oak Board ripped down to size (ours is 17″ x 4″) We used Oak because we knew we would be staining it, if you want to paint yours, I would suggest using maple or poplar.
- Sand Paper
- English Chestnut Stain
- Drill
- Brass Gallery Rail
- Bolt Cutter or Metal Blade to cut our gallery rail
- Corner Brace (we purchased the steal ones, spray painted them black and then applied European Gold Rub’nBuff to match our mirrors and sconces)
- Screws & Anchors (if you aren’t securing into a stud)
Here’s How We Made & Hung The Shelf
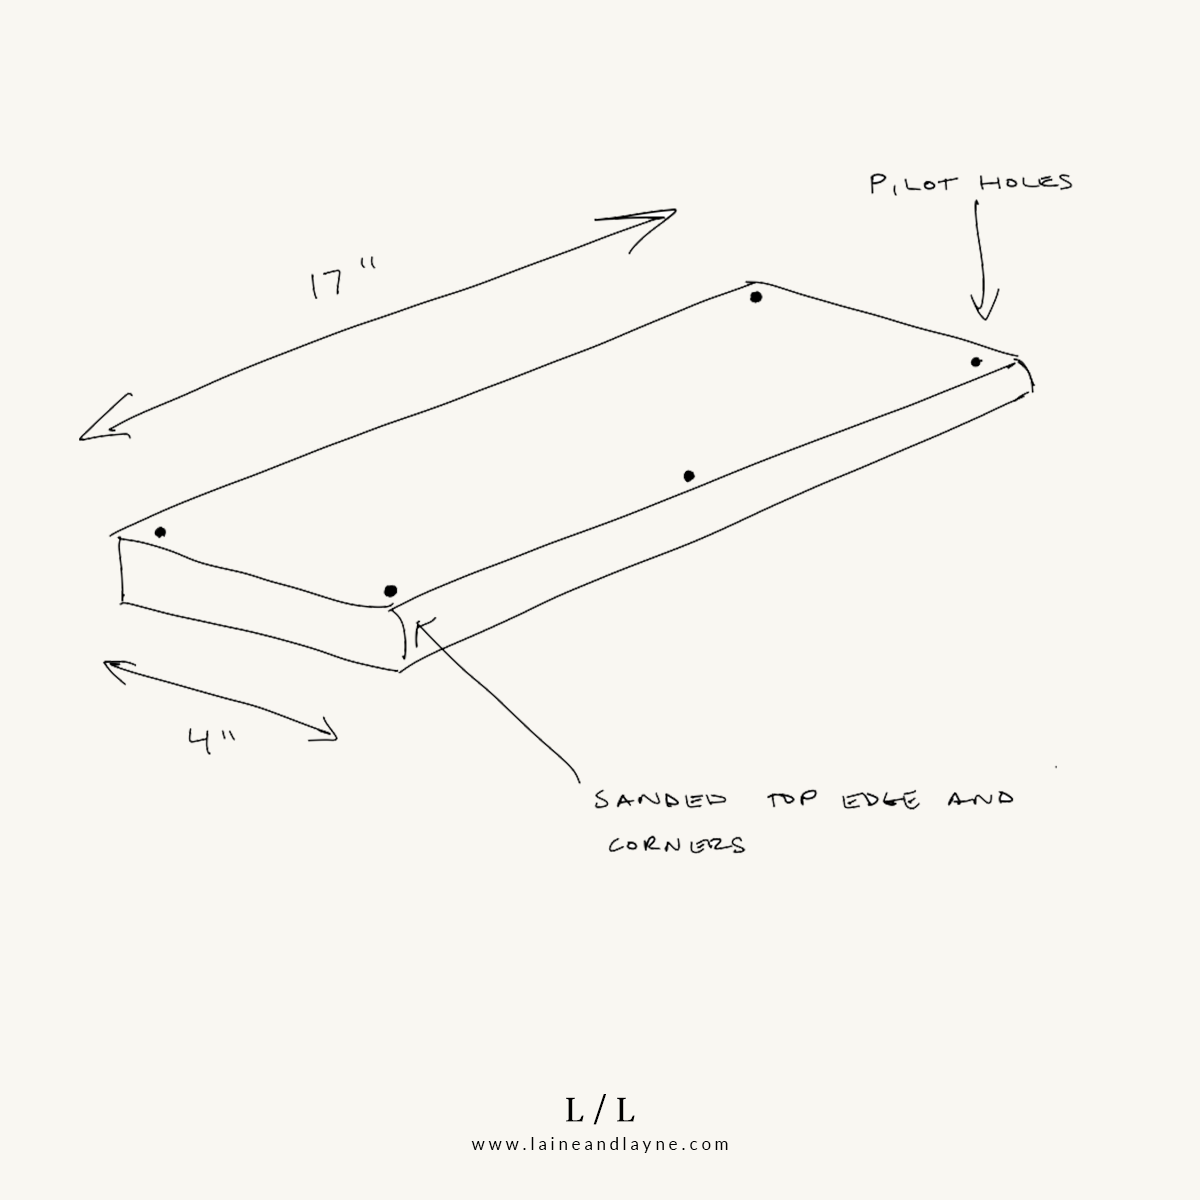
1. Determine the size you want your shelf to be. Keep in mind, you can use a 1×6 instead of a 1×4 if you want more depth to your shelf. As you can see above, we didn’t have a lot of space to work with, so we chose a more shallow in depth shelf which is why we used a 1×4.
2. Cut your board down to size and sand to remove any splinters. We also sanded the top edge and corner of our board so it has a subtle rounded edge. The hardware store can cut the board for you if you don’t have the power tools.
3. Stain or Paint your shelf. We stained ours in English Chestnut and needed about two coats.
4. With a pencil, mark where you will be drilling to install the finials.
5. Measure the distance in between each finial and cut your gallery rods to size with either a Bolt Cutter or a Metal Blade for your saw. (we used this blade and our Dremel)
5. Drill holes for the finials. (our finials had a smooth peg that just went right into the holes of the wood, the ones we are linking attach with a threaded screw, so be sure you drill your holes all the way through your board)
6. Starting on one side, place your finials down into the holes, adding in the rails as you go.
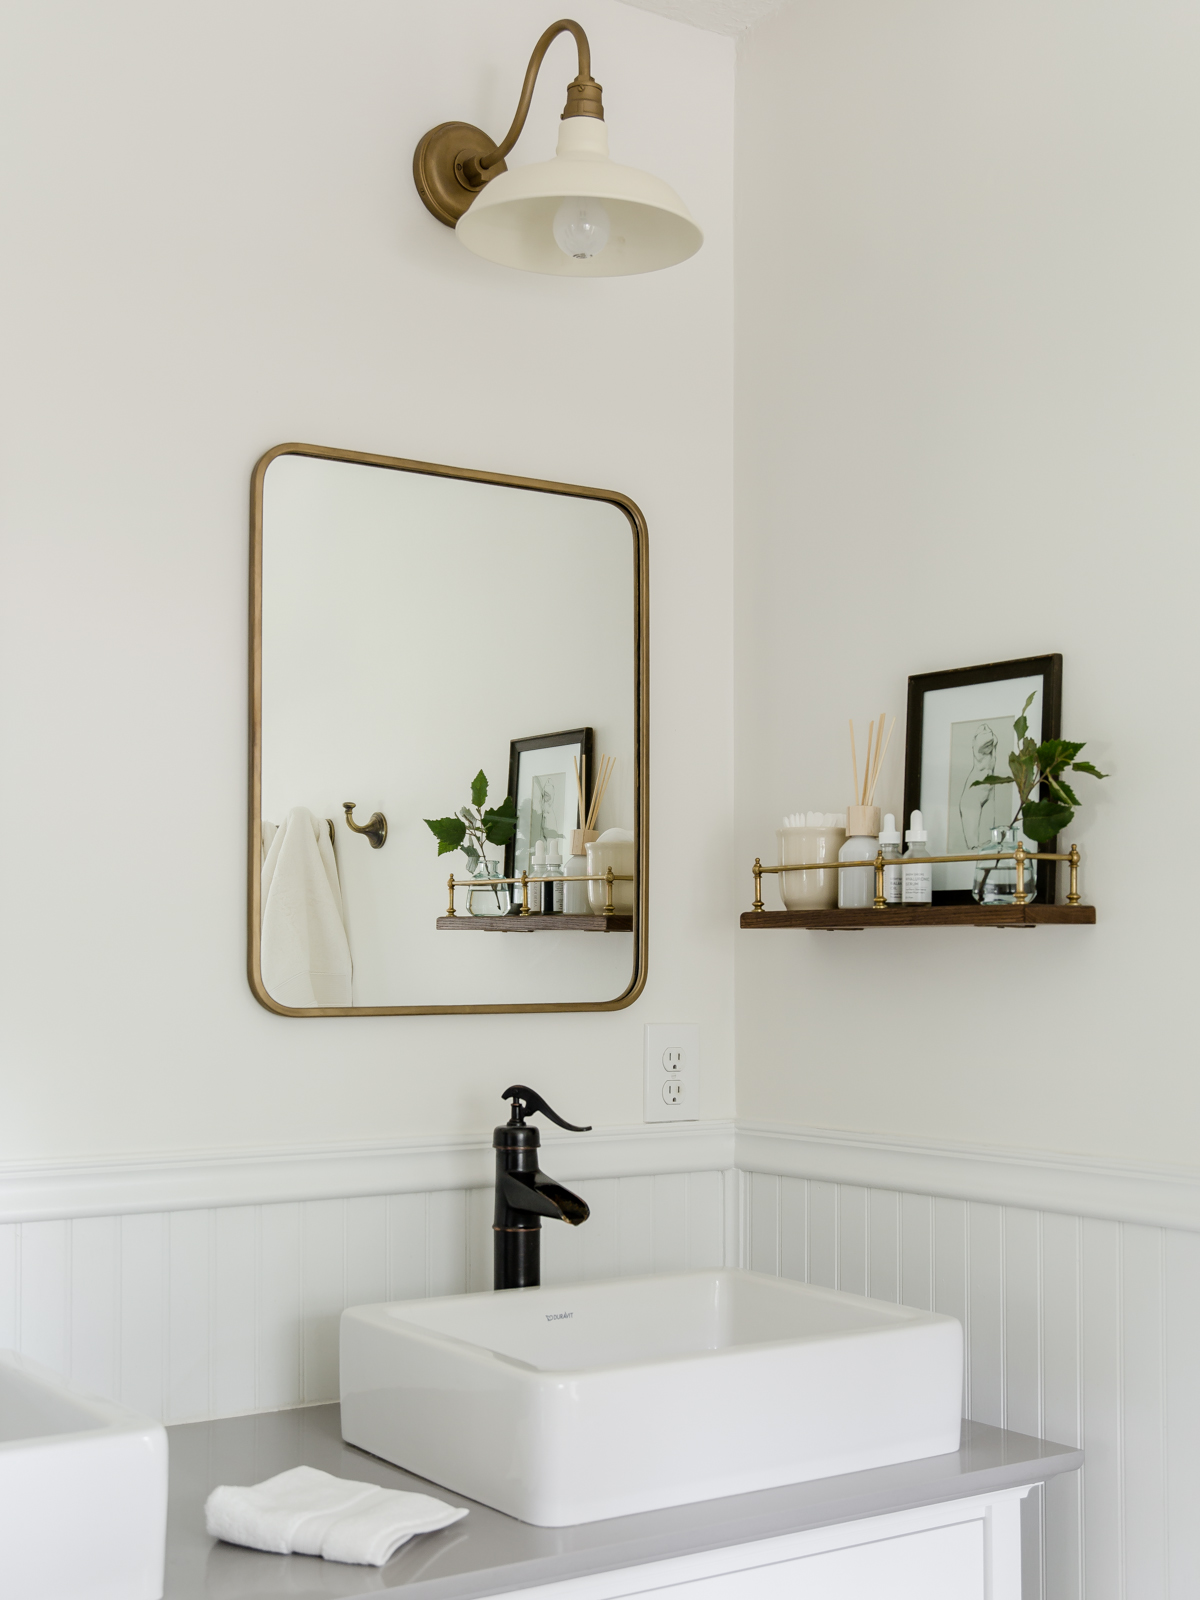
7. Time to hang! You can absolutely use shelf brackets if you want to go that route, but due to the size of our shelf, I didn’t want the brackets to stand out and since the shelf isn’t holding a lot of weight, we used Corner Brackets to secure our shelf to the wall. (you can see in the photos, the bracket on the underneath of the shelf) NOTE: we had to notch out a small area on the back of the board since the corner brackets have a small bump in the corner of the brackets.
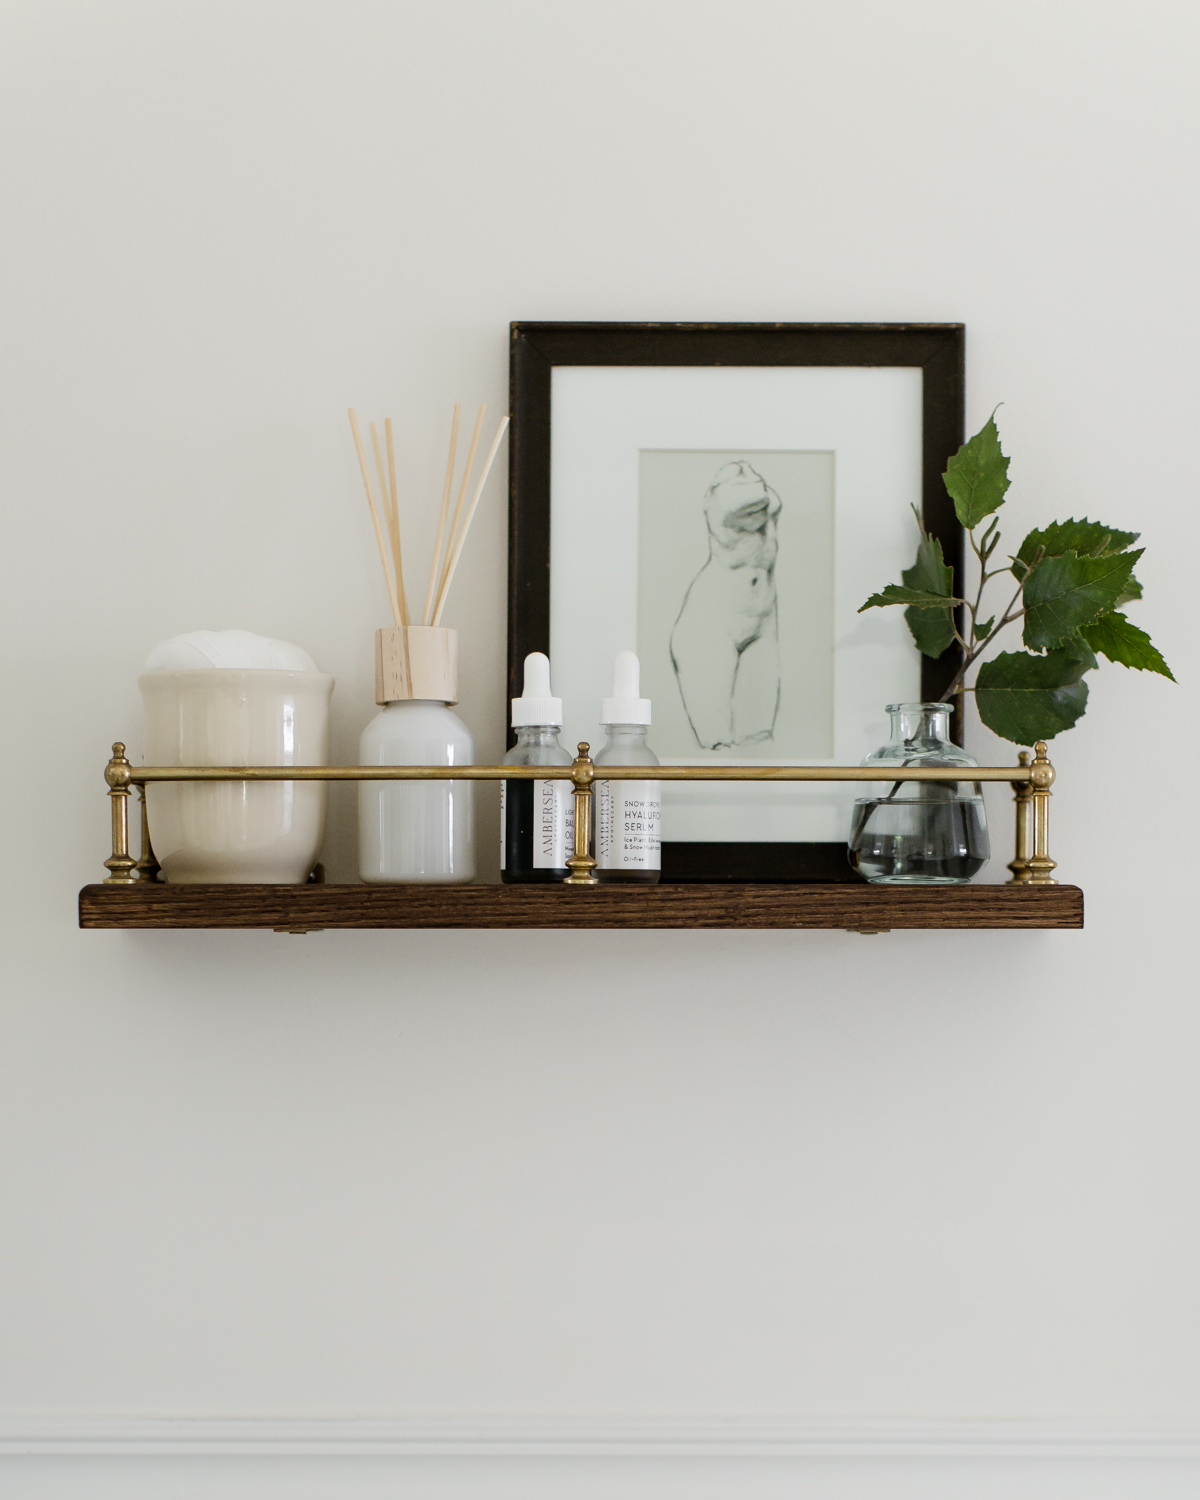
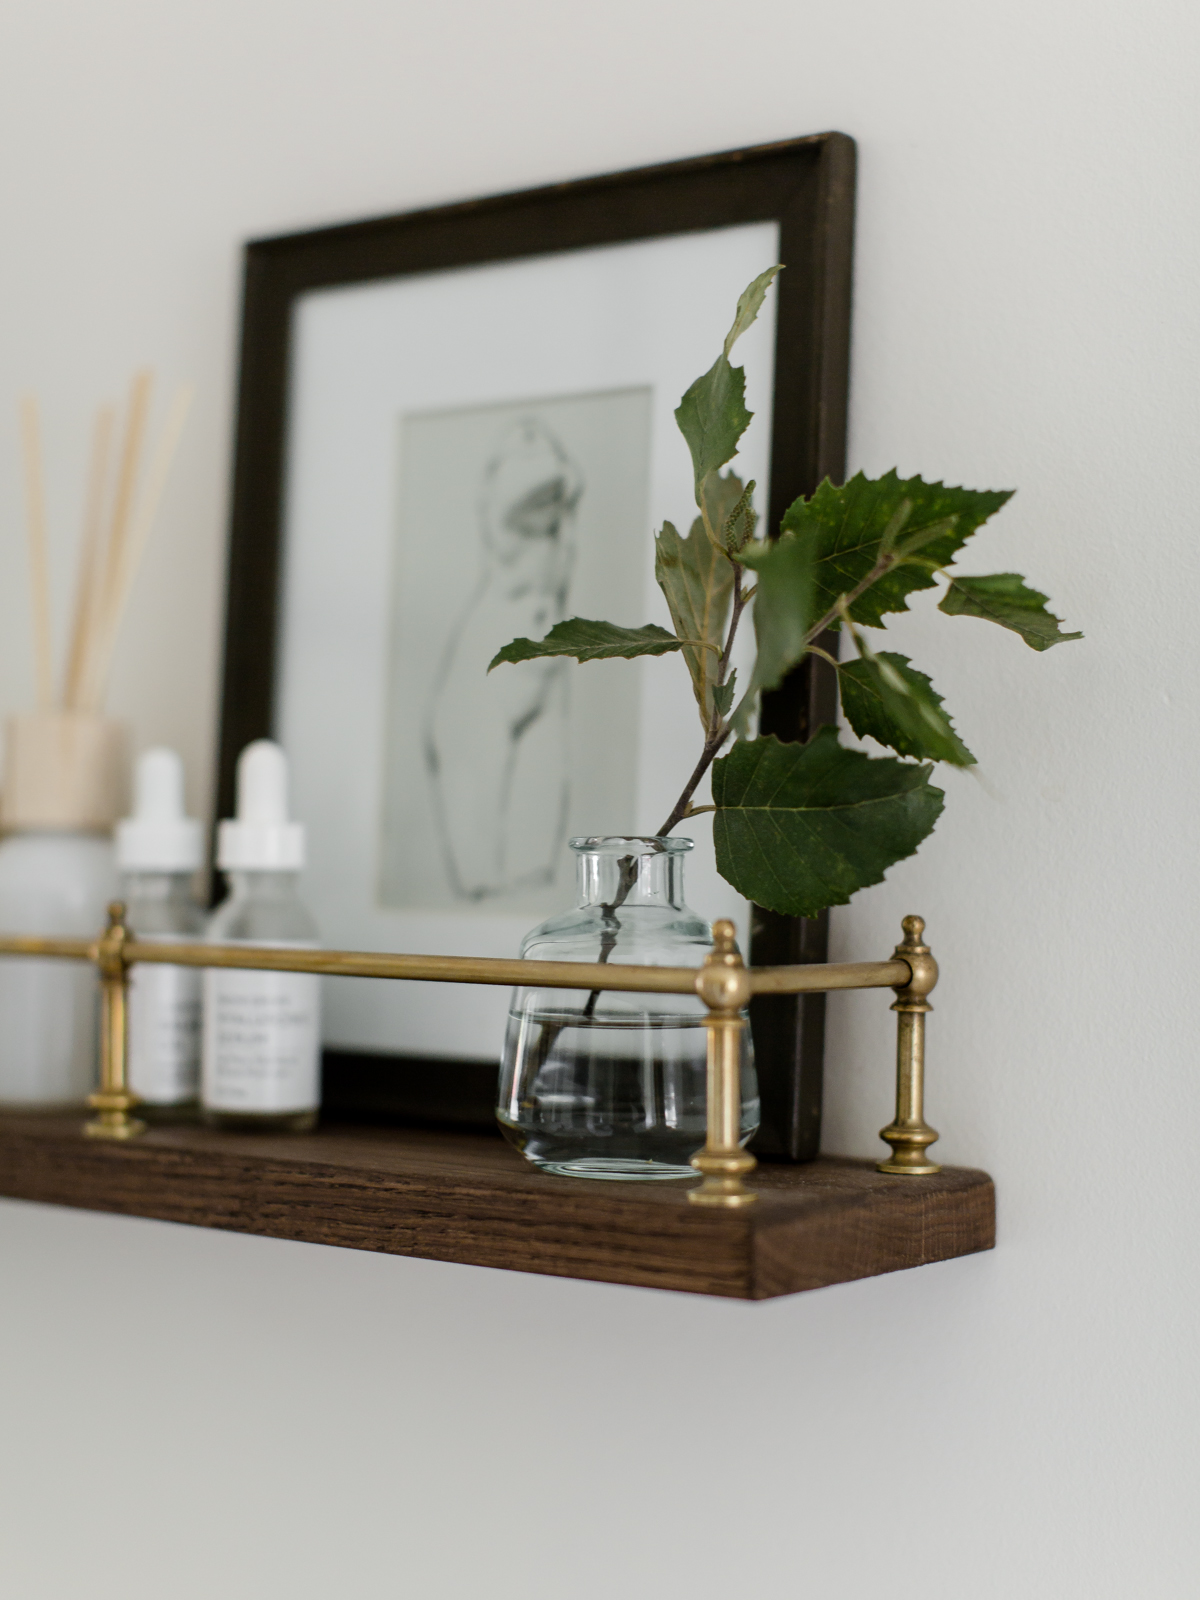
Now for the fun part of styling your shelf!
We included a bud vase that fit perfectly to hold a little foraged branch, vintage-inspired artwork from our art collection, an oil diffuser (which smells amazing- we have the Intention and Daydream scents), and a ceramic beaker to hold cotton rounds.


Wow! It looks amazing!
Thank you for the inspiration!!
Which finials did you purchase? I really love the height of the ones you used but the ones in the link above look much smaller.
The ones we used were from a piece of antique furniture that we already had, so I linked similar options! Etsy is another place to look as well!
Love this DIY – I’m looking at the website for the rails and it looks like they offer two colors of bass. Which one did you use for this project? polished unlacquered or antique?
Thanks!
Hi Noel! We recommend unlacquered as they will patina over time! You will always be able to restore the original finish by polishing them with a little bit of brass cleaner, but we love the patina ours has acquired!
Hi! I’m obsessed with the shape of your gallery rails. The link takes you to Vintage Hardware, but I’m not seeing these. Just making sure the link is correct…if so, looks like they don’t make them anymore. Bummer!
Hi Rachel! The rails we used were from a piece of furniture we already owned that we repurposed. I would suggest looking on Ebay or Etsy for similar ones if you do not like the ones we linked!